


ABSTRACT
We conducted one-dimensional and two-dimensional hydrodynamic simulations of post-shock revival evolutions in core-collapse supernovae, employing the simple neutrino light bulb approximation to produce explosions rather easily. In order to estimate the explosion energy, we took into proper account nuclear recombinations and fusions consistently with the equation of state for matter not in statistical equilibrium in general. The methodology is similar to our previous work, but is somehow improved. In this paper, we studied the influence of the progenitor structure on the dynamics systematically. In order to expedite our understanding of the systematics, we constructed six parametric progenitor models, which are different in masses of Fe iron core and Si+S layer, instead of employing realistic models provided by stellar evolution calculations, which are sometimes of stochastic nature as a function of stellar mass on the main sequence. We found that the explosion energy is tightly correlated with the mass accretion rate at shock revival irrespective of dimension and the progenitors with light iron cores but with rather high entropies, which have yet to be produced by realistic stellar evolution calculations, may reproduce the canonical values of explosion energy and nickel mass. The mass of the Si+S layer is also important in the mass accretion history after bounce, on the other hand; the higher mass accretion rates and resultant heavier cores tend to hamper strong explosions.
Export citation and abstract BibTeX RIS
1. INTRODUCTION
In the last 10 years we have seen remarkable progress in the theoretical modeling of core-collapse supernovae (CCSNe; Janka 2012; Kotake et al. 2012; Burrows 2013, and the references therein). Massive stars of ≳10 M⊙ end their lives as CCSNe and leave behind compact objects such as neutron stars and black holes. The mechanism of CCSNe has been elusive for more than half a century in spite of intensive investigations in the intervening years by many researchers. It has now been pinned down to the problem of how to revive a stalled shock wave and the most promising at present is the so-called neutrino-heating mechanism. After many years of failed attempts, we now have a large number of numerical models that were successful in shock revival (Marek & Janka 2009; Müller et al. 2012; Bruenn et al. 2014; Suwa et al. 2014; Takiwaki et al. 2014; Nakamura et al. 2015). This is mainly due to the ever increasing computational power as well as the implementation of elaborate numerical schemes, particularly for neutrino transport, which enabled us to perform long-term simulations in multi-spatial dimensions. Accompanied sophistications in the treatment of microphysics, such as the nuclear equation of state and weak interactions between neutrinos and matter, have also contributed to the improvement of the theoretical modeling.
It is certainly true that these models are promising candidates to answer the long-standing problem of the CCSNe mechanism, but one should not forget that the revival of the stalled shock wave that these simulations have demonstrated is just a necessary condition for supernova explosion, though is not a sufficient condition. As a matter of fact, we know that the explosion energy of CCSNe is ∼1051 erg canonically, but most of these computations were not yet successful to obtain the number (Marek & Janka 2009; Müller et al. 2012; Suwa et al. 2014; Takiwaki et al. 2014; Nakamura et al. 2015; see also Bruenn et al. 2014). The yield of Ni is another important quantity, since they decay radiatively and brighten the supernova ejecta later. We can infer the mass of synthesized Ni from the exponential decay observed in the light curve over hundreds of days after the initial brightening. It is typically ≲0.1 M⊙ (Hamuy 2003; Nomoto et al. 2006; Kochanek et al. 2008; Utrobin & Chugai 2008; Smartt et al. 2009). It is not clear whether the most advanced theoretical models can indeed reproduce this quantity, since it takes many seconds for the mass of Ni in the ejecta to be settled. In fact, most of the successful simulations cited above were not able to extend their computations much beyond a second because the CPU time would simply be unaffordable or some physical processes that are important in the late phase were not incorporated in their models.
Taking a more phenomenological approach, in a previous paper (Yamamoto et al. 2013) we studied how the explosion energy and Ni yield are determined after shock revival. We constructed steady, spherically symmetric accretion flows through a standing shock wave onto a proto-neutron star (PNS) for different combinations of neutrino luminosity and mass accretion rate. Assuming that shock revival occurs somewhere on the critical curve, we ran both one-dimensional (1D) and two-dimensional (2D) hydrodynamical simulations to compute the evolutions that follow the shock revival induced by artificially increasing the neutrino luminosity slightly above the critical value. The central region that includes the PNS was excised and replaced by a time-dependent inner boundary condition prescribed appropriately. The neutrino transfer was approximated by the so-called light bulb approximation. On the other hand, an NSE or non-NSE equation of state was employed in the region where it is appropriately. The use of latter in particular was combined with network calculations of nuclear reactions such as recombinations and fusions so that smooth transitions from one regime to the other should be guaranteed, with α-rich freeze out. The simulations were conducted long enough, for a few seconds normally, but for more than a thousand seconds in some cases after shock revival so that the explosion energy and the Ni mass could be well settled.
We found in these experimental simulations that the neutrino heating becomes minor rather soon after shock revival as matter expands to larger radii. The energy of neutrinos were mainly consumed to lift up matter from the gravitational well and set the stage for shock revival. Then the recombinations of nucleons to alpha particles to heavier nuclei become the main contributors to the explosion energy (see also Papish et al. 2015). They proceed under NSE initially but some nuclear reactions cannot catch up to the expansion and are frozen later. In the final stage, the explosive nuclear fusions contribute relatively small energies. In the meantime, a fraction of matter falls back onto the PNS, decreasing the energy as well as the Ni mass included in the ejecta. The final explosion energy is obtained after the negative gravitational energy of the envelopes that are engulfed by the forward-propagating shock wave is accounted for. The time for the explosion energy and the Ni mass in the ejecta to be finally settled depends on the strength of explosion: it takes longer as the explosion energy gets smaller. It was also demonstrated, on the other hand, that the earlier the shock revival sets in, the larger the final explosion energy. The Ni mass has the same trend. Interestingly, we found that the 1D models tend either to synthesize too much Ni (≳0.1 M⊙) or to produce too weak explosions (≲0.5 × 1050 erg) and a fine tuning in the shock revival time seems necessary to reproduce the canonical explosion, which we interpreted as another setback for spherically symmetric explosions. Such a tuning was somewhat relaxed in 2D models.
These findings should certainly be confirmed by more realistic simulations. It is also important, however, to study their systematics, i.e., how they depend on, e.g., the progenitor structure, inner boundary condition, and so on, since we adopted a single progenitor of 15 M⊙ (Woosley & Heger 2007) and did not try different conditions at the inner boundary. It is well known in fact that the structures of massive progenitors are very sensitive to small differences in mass as well as the numerical treatment of some physical processes such as convections in the stellar evolution calculations (Woosley et al. 2002; Woosley & Heger 2007; Langer 2012; Sukhbold & Woosley 2014). It is hence mandatory to see how robust our findings are when we change progenitors and this is exactly what we aim to clarify in this paper. In doing so, we did not use the progenitor models provided by stellar evolution calculations. Instead, we constructed toy models of progenitors, in which non-rotating, hydrostatic configurations with an iron core in NSE, a Si+S mantle in quasi-statistical equilibrium (QSE), as well as other outer envelopes are calculated by employing parametrized distributions of entropy and electron fraction as a function of density. By doing so, we can vary the masses of these different layers rather arbitrarily. We are also able to obtain the abundance of various elements so that we could use them later for the network calculations.
These models are better suited for the systematic studies conducted in this paper than more realistic models. As mentioned above, the structures of the realistic models change in a complicated way as a function of mass (Sukhbold & Woosley 2014), which makes it difficult to interpret which features in the progenitor result in which consequences. It is not helpful either that the progenitor models provided by different groups are sometimes very different (Limongi & Chieffi 2006; Paxton et al. 2011; Yoshida & Umeda 2011; Ekström et al. 2012; Jones et al. 2015) and the structures of massive stars are likely to be very sensitive intrinsically to some input physics as well as to numerical resolutions (Sukhbold & Woosley 2014). As shown later, adopting an appropriate entropy distribution and paying a proper attention to the transition condition at the layer boundary, we can capture the essential features in the massive progenitors.
The organization of this paper is as follows: the input physics and numerical method are described in Section 2. Special emphasis is put on the construction of the toy models of progenitors. Section 3 is devoted to the results of 1D and 2D dynamical simulations: we first compute 1D collapses to obtain the accretion rates as a function of time for all models; we then construct spherically symmetric, steady shocked accretion flows for the accretion rates just obtained and a prescribed neutrino luminosity and use them as initial conditions for 1D and 2D hydrodynamical simulations; the dependence of the explosion energy and Ni mass on the progenitor structures is described in detail. Finally, we summarize our findings and discuss some implications in Section 4.
2. MODELS AND NUMERICAL METHODS
2.1. Outline of Methods
The methodology employed in this paper is essentially the same as that in our previous paper (Yamamoto et al. 2013). One single big difference is, as mentioned in Introduction, that multiple progenitor models are constructed systematically, as described in the next subsection in detail, and study the dependence of the energy and Ni mass in ejecta on the progenitor structure. In order to evaluate the asymptotic values of these quantities, we take the following four steps.
- 1.Construct the toy models of pre-supernova stars with different masses of iron cores and Si+S layers.
- 2.Run 1D hydrodynamical simulations of gravitational collapse of the pre-supernova models obtained in the first step, excising the central part and thus reducing the pressure support there by hand. This step is needed to obtain the mass accretion histories for these models, which are used in the following steps.
- 3.Construct spherically symmetric, steady accretion flows through stalled shock waves for mass accretion rates obtained in the first step and neutrino luminosities, which are chosen to be close to the critical values for the assumed mass accretion rates.
- 4.Run 1D and 2D hydrodynamical simulations for the accretion flows just constructed. Small perturbations are added in the 2D computations. The matter distributions obtained in the first step are employed outside the shock wave. The neutrino luminosities change in time in a prescribed way. Since the initial configurations are close enough to the critical states, shock revival takes place soon after the simulations are started. The ensuing evolutions are followed until the explosion energy is well settled.
It is noted that the determination of the critical curve (see Burrows & Goshy 1993; Yamasaki & Yamada 2005; Pejcha & Thompson 2012; Suwa et al. 2014, for details), which corresponds to the third step, is slightly changed from the previous work. We follow Murphy & Burrows (2008) to take account of the temporal change in the mass accreation rate which is commonly used by others these days.
It should be also mentioned that the simulations in the final step are terminated when the energy in the ejecta becomes almost unchanged. In 1D models this also means the settlement of the Ni mass in the ejecta by that time. This is not the case, however, in 2D computations unfortunately, since larger fractions of ejecta tend to fallback at later times and it takes much longer to get the Ni mass settled: in some cases the explosion energy reaches the final value in ∼1 s, whereas the Ni mass has not reached the asymptotic value yet even after ∼10–100 s. The simulations are terminated before the Ni mass is finally settled in those cases, since a further computation would require us to take into account the outer envelopes such as helium and hydrogen layers, which would not be a trivial thing. It is also stressed that we are concerned with the influences of the structures of the stellar central region involving the iron core and Si+S layers on the shck revival and the dynamics that follows. We hence decide to avoid unnecessary complications in this paper. The earlier termination of simulations would underestimate the fallback and hence overestimate the Ni mass. Then we should regard the numbers given in that case as upper limits, which would not spoil our arguments anyway.
2.2. Pre-supernova Models: Step 1
As we have mentioned already, we do not use realistic progenitor models that are put in the public domain by researchers of stellar evolutions (Woosley et al. 2002; Limongi & Chieffi 2006; Paxton et al. 2011; Yoshida & Umeda 2011; Ekström et al. 2012), but instead construct toy models on our own. This is mainly because those realistic models have structures that are sensitive to the stellar mass as well as some physical processes, e.g., convections of various kinds, and their numerical implementations (Langer 2012; Sukhbold & Woosley 2014), which would make it difficult to decipher what is the consequence of which effect. Since our studies are of experimental nature, "realism" is not very important and toy models that capture the essential features in massive stars' structures but still have some degrees of freedom to change key parameters, e.g., the masses of Fe core and Si+S layer, rather arbitrarily, which is more useful. In this subsection, we present in detail the construction of such toy models.
It is well known that the masses of the Fe core and Si+S layer are critically important for shock revival (Buras et al. 2006; Suwa et al. 2014) because both of them one way or another affect the neutrino luminosity and mass accretion rate, the main controlling parameters of the stagnant shock wave. They are notoriously stochastic as a function of the stellar mass, though. Figure 1 illustrates this, showing the masses of the Fe core and Si+S layer for various pre-supernova models with 11–40 M⊙ taken from Woosley et al. (2002, hereafter WHW2002). It is evident that neither the iron core mass, Mc, nor the Si+S mass, MSiS, is a monotonic function of the progenitor mass.

Figure 1. Masses of the Fe core and Si+S layer for the pre-supernova models with 11–40 M⊙ by WHW2002. The left panel displays the Fe core masses, Mc, which have non-monotonic changes between 1.2 M⊙ and 1.7 M⊙, whereas the right panel gives the masses of the Si+S layer, MSiS, which also show large fluctuations between 0 M⊙ and 0.25 M⊙.
Download figure:
Standard image High-resolution imageIf we pay attention, however, to the entropy, S, and electron fraction, Ye as a function of density inside the Fe core, which is defined hereafter to be the central region in the NSE, those apparently diverse progenitors can be nicely categorized into three groups, as demonstrated for the same pre-supernova models in Figure 2. The first group is characterized by the relatively low entropies, i.e., S < 1.75kB at the edge of the Fe core and is plotted in the left panel with the label "L." Here kB is the Boltzmann's constant. On the other hand, the right panel shows the models that have rather high entropies, 2.3kB < S, at the edge and are referred to with the label "H." In between fall most of the pre-supernova models, as demonstrated in the middle panel labeled with "M." They are conveniently characterized by the moderate entropies of 1.75kB ≤ S ≤ 2.3kB at the edge of Fe core. The important thing is that the members of each group seem to obey approximately the same ρ–S and ρ–Ye relations irrespective of their Fe core masses. One may complain that the boundary between groups "M" and "H" is rather blurred as long as the value of the entropy at the edge of Fe core is concerned. Note, however, the different locations of the jump in the entropy distributions between the two groups: it occurs at a lower density for group "H" than for group "M." It is also mentioned that the members of group "H" have larger values of compactness ξ2.5 (O'Connor & Ott 2011; Sukhbold & Woosley 2014) and may form a black hole instead of a neutron star.

Figure 2. Entropy and electron fraction inside the core as density functions for 11–40 M⊙ pre-supernova stages from WHW2002 models. The left panel shows the low-entropy group (only two progenitor) labeled "L." Here kB is the Boltzmann's constant. On the other hand, the right panel shows the high-entropy group (eight progenitor) labeled "R." The rest of the progenitors are labeled as medium-entropy group, "M." The color contour illustrates the zero-age main sequence mass of each model.
Download figure:
Standard image High-resolution imageIt is found from Figure 2 that S and Ye as functions of ρ have some features in common among these groups: plotted as in the figure, they are almost linearly increasing from the central point of star corresponding to the right ends of lines until a certain point, where S and Ye jump nearly discontinuously; the positions of the latter points are different among the three groups, as mentioned already, and mark the locations at which the shell Si burning once took place. It induced violent convection outside the shell and produced almost homogeneous entropy and Ye distributions there, which were later bent downwards at smaller radii by electron captures on nuclei during the subsequent phase. The resultant distributions of S and Ye are approximated by parabolic functions quite well. Inside the Si burning shell, on the other hand, matter stratification is stable against convection mainly due to efficient neutrino cooling in the central region. As a result, the linear distributions just mentioned are obtained there for S and Ye. These functional relations are later used to build the toy model.
We also point out the correlation between the central density and the mass of the Fe core as shown in Figure 3, although there are some scatters: massive cores tend to have smaller central densities just prior to collapse. This is mainly because of the generic trend that the more massive the core is, the higher the entropy becomes due to the shorter lifetime and, as a consequence, the less efficient neutrino cooling. We will use this correlation in the following when we construct the toy model.

Figure 3. Central density distribution among the various core masses in 11–40 M⊙. Although there are several scatters, the strong correlation is shown in the relation between the two, The color contour represents zero-age main sequence mass. The black dotted line represents the central density as the function of iron core mass employed in this paper (see Equation (6)).
Download figure:
Standard image High-resolution imageIt is stressed again that the purpose of the toy model is to reproduce key features commonly observed in the massive star structures just prior to collapse, simultaneously leaving some degree of freedom to modify them rather arbitrarily for systematic studies. We thus might be able to suggest a feature or features that may be essential to robust shock revival but may have somehow eluded the current stellar evolution theory. In this series of papers, we will study the effects on the shock revival of various features in the massive star structures reproduced by the toy model one after another. In this first paper, we pay particular attention to the masses of the iron core, Mc, and of the Si+S layer, MSiS, which certainly play major roles in the neutrino-heating mechanism, dictating the neutrino luminosity and accretion rate, the two key parameters in the mechanism. Other features may be equally or more important and will be investigated in the sequels (Y. Yamamoto & S. Yamada 2016, in preparation).
Among three groups we focus on group M in this paper, since it is the largest group, to which most of the progenitor models we show in Figure 2 belong, and it is hence supposed to represent the canonical progenitor of CCSNe. We then use the following parametrization for the entropy S and electron fraction Ye as functions of ρ:
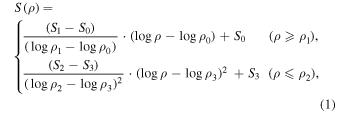
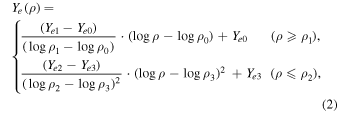
in which ρ1 = 108.5 g cm−3 and ρ2 = 108.4 g cm−3 specify the region where the jump occurs, and the other parameters determine the shapes of the functions and their values are set to ρ0 = 109.8 g cm−3, ρ3 = 107.1 g cm−3, S0 = 0.70kB, S1 = 1.50kB, S2 = 2.00kB, and S3 = 2.30kB and Ye0 = 0.435, Ye1 = 0.467, Ye2 = 0.465, and Ye3 = 0.482. In the transition region between ρ1 and ρ2, S and Ye are interpolated linearly in  . Figure 4 displays the resultant relations (black dotted lines) between S and ρ in the left panel and between Ye and ρ in the right panel together with the 30 pre-supernova models from WHW2002 (colored solid lines), which consist of group "M." It is clear that the essential features of the group are well reproduced.

Figure 4. Same as Figure 2 but selecting only the group "M" adding our model profiles. The black dashed lines in two panels are analytical functions employed in the current paper (see Equations (1) and (2) and details in the text).
Download figure:
Standard image High-resolution imageNext we shift our attention to outer layers. We begin with the Si+S layer, which neighbors the Fe core. The important feature of this layer is that nuclei are no longer in the NSE but the temperature is still high enough to maintain the so-called QSE (Hix & Thielemann 1999), in which the Fe group, Si group, and another group of lighter elements separately establish chemical equilibrium among the elements belonging to each group (see Appendix
The treatment of other outer envelopes, in which no chemical equilibrium is established even approximately, are simplified further: homogeneous distributions of entropy, electron fraction, and chemical abundance are assumed in each of these layers. This is not so bad an approximation, though, since convection once prevailed in most of these layers, making the entropy and chemical abundance uniform there. We take the typical values from WHW2002 (see Table 1). As explained shortly, since we solve the hydrostatic equations to build the toy models, we assume the continuity of pressure at their boundaries. The parameter values we choose are further constrained if one were to calculate the evolutions of chemical abundances later, since the timescale of nuclear reactions,  , should be longer than the dynamical timescale,
  , in every layer. Note that τnuc may be shorter than the typical time for the consumption of nuclear fuel owing to the rises of density by core contraction, especially in silicon and oxygen–neon–magnesium layers.
Table 1. Parameter Sets used in Toy Pre-supernova Stage Construction
| Core | QSE | Si+S+O | O+Mg+Si | O+Ne+Mg | C+O | C+O+He | He | |
|---|---|---|---|---|---|---|---|---|
| M (M⊙) | Mc | MSiS | 0.36-MSiS | 0.09 | 2.21-Mc | 0.15 | ≳0.10 | ≲1.10 |
S
|
Equation (1) | 3.3 | 4.0 | 5.0 | 5.9 | 6.5 | 7.6 | 12.0 |
| Chemical | ⋯ | ⋯ | XSi = 0.45, | XO = 0.80, | XO = 0.70, | XC = 0.20, | XC = 0.30, | XHe = 1.00 |
| Abundance | NSE | QSE | XS = 0.35, | XMg = 0.15, | XNe = 0.25, | XO = 0.80 | XO = 0.60, | ⋯ |
| Xk | ⋯ | ⋯ | XO = 0.20 | XSi = 0.05 | XMg = 0.05 | ⋯ | XHe = 0.10 | ⋯ |
Note. In this paper, we pay attention mainly to the core mass, Mc = 1.3, 1.4, 1.5 M⊙ and Si+S layer mass, MSiS = 0.09, 0.18 M⊙.
Download table as: ASCIITypeset image
As already mentioned repeatedly, the toy models are obtained by solving the hydrostatic equations for non-rotating, spherically symmetric stars. Instead of solving the equations for energy generation and transport, we employ the functional relations described above for the Fe core and the constant S and Ye distributions in the outer layers. As for the chemical abundances, NSE and QSE are assumed in the Fe core and Si+S layer, respectively. The uniform distributions of various elements are assumed in other outer layers. Then the basic equations for the NSE core are given as

where r, Mr, and P are the radius, mass coordinate, and pressure, respectively. fP is a parameter to allow for some deviation from the complete hydrostatic equilibrium, which is commonly the case for realistic progenitor models provided by stellar evolution calculations, in which gravitational contraction has already sets in. It is assumed to be given by the following form:

which is found to fit the 30 realistic progenitor models with 11 ≤ MZAMS ≤ 40 that have entered the collapse phase. As for the outer envelopes, the basic equations are essentially the same except the piecewise constant S, Ye, and element distributions, as well as fp = 0. Since the layer boundaries are contact surfaces, pressure is assumed to be continuous there.
In this paper, we focus on the masses of the Fe core and Si+S layer. Six different combinations of three Fe core masses, Mc = 1.3 M⊙, 1.4 M⊙ and 1.5 M⊙, and two Si+S layer masses, MSiS = 0.09 M⊙ and 0.18 M⊙, are investigated. Given the Fe core mass, the central density is given by the following equation:

which is a fit to the correlation suggested in Figure 3 (see the black dotted line in the figure). Then the hydrostatic equations are integrated from the center to the specified masses of the Fe core and Si+S layer to give the corresponding radii. The integration is actually continued to larger radii, with other outer layers being properly taken into account.
The six solutions are shown in Figure 5, which depicts the enclosed masses and entropies per baryon as functions of radius for the three Fe core masses with the Si+S layer mass of MSiS = 0.09 M⊙ in the left panel and with MSiS = 0.18 M⊙ in the right panel, respectively. Note that we adopt different masses of C+O+He and He layers for the models with Mc = 1.30 M⊙ and with Mc = 1.40 M⊙ in the case of MSiS = 0.09 M⊙ in order to avoid unrealistic He burnings, although this has essentially no influence on the explosion energy and Ni mass.

Figure 5. Entropies and radii as functions of mass coordinate (upper panels) and the corresponding density profiles (lower panels). The Si+S layer mass is chosen to be MSiS = 0.09 M⊙ in the left panels and MSiS = 0.18 M⊙ in the right panels. Colors specify the core mass: Mc = 1.30 M⊙ (red), 1.40 M⊙ (green), and 1.50 M⊙ (blue), whereas solid and dotted lines represent the entropy and radius, respectively. The arrows illustrated in the top right panel depict the inital location of different chemical composition layers for Mc = 1.50 M⊙.
Download figure:
Standard image High-resolution imageIt is evident that the rather small differences in the core mass, ΔMc = 0.10 M⊙, and the Si+S layer mass, ΔMSiS = 0.09 M⊙, cause noticeable changes in the R–Mr relations and hence the density profiles in outer layers (Mr ≳ 2 M⊙): higher MSiS tends to make the greater differences at large radii for the same ΔMc. The compactness introduced by O'Connor & Ott (2011) also differs considerably among these models. The purpose of this paper is to study the consequences these differences may have on the shock revival, explosion energy, and Ni mass later in the dynamics of CCSNe.
It is noteworthy that the hierarchy in compactness depends on where it is measured: heavier Fe core models have higher compactnesses if they are measured in the silicon layer, whereas the hierarchy is inverted outside the ONeMg layer. This is because the entropy is higher at Mr ∼ 1.5–2 M⊙ for lighter Fe cores, making this layer more bloated. In the O+Ne+Mg envelope at Mr ∼ 2–2.7 M⊙, on the other hand, all models are assumed to have the same entropy again. Since the O+Ne+Mg envelope appears at lower densities in the models with heavier Fe cores, as can be seen in the lower panels of the figure, temperatures are higher in this layer for these models, which results in the more extended envelopes.
This feature was also reported in Baron & Cooperstein (1990; see their models "105" and "107" in Figure 9), who attempted to construct their own toy models, having similar parametric research in mind. They gave S and Ye as functions of mass coordinate unlike in this paper, in which they are considered as functions of ρ. It seems that they paid little attention to the correlation between S and Ye, both of which are influenced by the electron capture on heavy nuclei in a similar way. Note also that the two masses, Mc and MSiS, cannot be chosen completely arbitrarily with other parameters being fixed, since we perform network calculations to follow the temporal evolution of chemical abundances, the initial chemical compositions should be stable, i.e., the timescale of nuclear reactions should be longer than the dynamical timescale. It is also found that very high Mc and/or MSiS produce too large low-entropy regions and make it difficult to extend outer envelopes. Since we perform network calculations to follow the temporal evolution of chemical abundances, their models are not appropriate for our purpose.
2.3. Hydrodynamics
The numerical method employed in this paper for hydrodynamical computations is essentially the same as that in our previous work (Yamamoto et al. 2013). The hydrodynamical evolutions are solved on the spherical coordinates with the axisymmetric Eulerian code ZEUS-2D (Stone & Norman 1992; Hayes et al. 2006), which is extended by the authors so that chemical abundance evolutions could be treated consistently with a non-NSE EOS. For the 1D collapse computation (step 2 in Section 2.1), 500 radial grid points are deployed to resolve 100 km ≤ r ≤ 20,000 km. For the simulations of shock revival and the subsequent evolution (steps 3 and 4), we employ 650 radial grid points in 1D and  mesh points in 2D, which cover the domain with 45 km ≤ r ≤ 20,000 km and 0 ≤ θ ≤ 2 π. The central portion of the core is excised and replaced by a point mass located at the center, which exerts gravitational forces to the matter in the computational region. The temporal change in its mass is calculated from the matter flow going into the inner boundary. The inner boundary condition is essentially the same as in the previous paper (Yamamoto et al. 2013): all variables but radial velocity are copied from the innermost active mesh point to the ghost mesh points. The radial velocity is fixed until outflow occurs, in which case it is treated just in the same way as other variables except for the upper limit of 108 cm s−1. The densities on the ghost mesh points are also modified so that the entropy per baryon should not exceed 100kB. We use the same code both for 1D and 2D simulations; in the former of which we suppress motions in the θ direction.
We adopt the light bulb approximation instead of solving neutrino transfer and take into consideration only interactions of electron-type neutrinos and anti-neutrinos with nucleons when we conduct simulations in steps 3 and 4 for the shock revival and subsequent evolution. To approximately describe the neutrino-spheric radius, Rν, and temperature, Tν, that evolve in time due to PNS contractions, we employ the following analytical prescriptions for Rν:


and for Tν:


where t300 denotes the time in millisecond elapsed from 300 ms post-bounce. The prescriptions are determined so that they should fit more realistic simulations (Nakamura et al. 2015). The luminosities of electron-type neutrinos and anti-neutrinos are assumed to be same,  , gradually decay after the onset of explosion:

Another major improvement from the previous work is the nuclear physics employed. In order to calculate chemical compositions more precisely, we deploy 297 nuclei ( ) instead of 28 to describe NSE at T > 7.0 × 10⁹ K (see the list in Table 2). At T < 7 × 10⁹ K, where NSE no longer holds, on the other hand, the number is reduced back to 28: n, p, D, T, 3He, 4He, and 12 α-nuclei, i.e., 12C, 16O, 20Ne, 24Mg, 28Si, 32S, 36Ar, 40Ca, 44Ti, 48Cr, 52Fe, 56Ni, and 10 of their neutron-rich neighbors, that is,
  ,
,  ,
,  ,
,  ,
,  ,
,  ,
,  ,
,  ,
,  , and
, and  . The other 269 nuclei are represented by a single (imaginary) inert nucleus in the network calculations.
Table 2. A List of Nuclei Considered in NSE
| Element | Amin | Amax | Element | Amin | Amax |
|---|---|---|---|---|---|
| n | 1 | 1 | Cl | 31 | 40 |
| H | 1 | 3 | Ar | 33 | 44 |
| He | 3 | 6 | K | 35 | 46 |
| Li | 6 | 8 | Ca | 37 | 49 |
| Be | 7 | 11 | Sc | 40 | 50 |
| B | 8 | 12 | Ti | 42 | 52 |
| C | 10 | 15 | V | 44 | 54 |
| N | 12 | 17 | Cr | 46 | 56 |
| O | 14 | 20 | Mn | 48 | 58 |
| F | 17 | 21 | Fe | 50 | 62 |
| Ne | 18 | 25 | Co | 52 | 63 |
| Na | 20 | 26 | Ni | 54 | 67 |
| Mg | 21 | 28 | Cu | 57 | 69 |
| Al | 23 | 30 | Zn | 59 | 72 |
| Si | 25 | 33 | Ga | 61 | 74 |
| P | 27 | 35 | Ge | 63 | 78 |
| S | 29 | 38 |
Note. Total number of nuclei is 297 with Z ≦ 32.
Download table as: ASCIITypeset image
3. RESULTS
3.1. Accretion Histories: Step 2
We present first the results of 1D computations of the collapse phase, i.e., Step 2 mentioned in Section 2.1. The time evolutions of the mass accretion rates,  , measured at r = 100 km are depicted in Figure 6. After the onset of collapse,
  first rises rapidly, reaching ∼100 M⊙ s−1 at maximum, and then drops rather quickly to ∼1 M⊙ s−1. The entire core shrinks to r ≤ 100 km at around the peak time, which roughly corresponds to the core-bounce time in realistic simulations and hence which we refer to as the bounce time in the following. The mass accretion rates decay more gradually thereafter with a few discernible steps, which correspond to the passages of layer boundaries. These behaviors are qualitatively consistent with Buras et al. (2006), Yamamoto et al. (2013), and Suwa et al. (2014). More detailed analyses are given in Appendix

Figure 6. Time evolutions of the mass accretion rate at 100 km for all models. The upper panels show the results for the models with MSiS = 0.09 M⊙, whereas the lower panels are the counter parts for the models with MSiS = 0.18 M⊙. In the left panels, the time is measured from the onset of collapse while in the right panels the origin of time is shifted to the bounce time, which is defined to be the time at which the mass accretion rate reaches maximum. The red, green, and blues lines correspond to the core mass of Mc = 1.30, 1.40, and 1.50 M⊙, respectively. The arrows in the right panels indicate which layer is passing through r = 100 km at which post-bounce time for Mc = 1.50 M⊙.
Download figure:
Standard image High-resolution imageIt is interesting to point out that if we horizontally shift the curves of  for the models with different core masses but with the same Si+S mass so that the bounce times should coincide with each other, then the entire curves also agree rather well with each other as demonstrated in the right panels of Figure 6, except that the steps occur at different post-bounce times. Comparing models with different MSiS but with the same Mc, we find that the outer boundary of Si+S+O layer reaches r = 100 km at almost the same post-bounce time irrespective of MSiS, although the outer edges of Si+S layer arrive at different times. This is mainly due to the fact that the enclosed mass at the outer boundary of the Si+S+O layer is common. It is interesting that the difference in MSiS is reflected in the accretion of the Si+S layer alone, not affecting the infall of outer layers.
Note in particular the difference in the positions of the steps in the mass accretion rate as a function of time, which are produced by the passage of boundaries between different layers. This is a direct consequence of the different masses of Fe core and Si+S layer. As discussed later, it is reflected in the shape of the critical curve (see Section 3.2.1 and also Appendix
3.2. Critical Luminosity and Diagnostic Explosion Energy: Steps 3 and 4
To explore the shock revival by neutrino heating and the subsequent evolution with hydrodynamical simulations in 1D and 2D, we first construct spherically symmetric, steady, shocked accretion flows for initial conditions (Step 3 in Section 2). They are characterized by three parameters, i.e., the mass accretion rate, neutrino luminosity, and mass of the PNS. As for the first and third parameters, we adopt the post-bounce time of the accretion histories in Step 2 at tpb = 300 ms. We have three options for the second parameter, i.e., the neutrino luminosity, on the other hand:  , Lν = 2.0, 2,3, 2.5 × 1052 erg s−1, or Lν,52 = 2.0, 2.3, 2.5, which are applied to each of the six progenitor models constructed in Step 1. The properties of these 18 shocked accretion flows are summarized in Table 3.
Table 3. The List of the Steady Solution Properties at tpb = 300 ms in Different Neutrino Luminosity
| Modela |
 (M⊙ s−1) (M⊙ s−1) |
Mgb (M⊙) | Rgc (cm) | Rshd (cm) | MPNSe (M⊙) |
|---|---|---|---|---|---|
| 1.3S09Lnu2.0 | 5.20E−01 | 6.67E−03 | 8.61E+06 | 1.38E+07 | 1.49E+00 |
| 1.4S09Lnu2.0 | 4.94E−01 | 5.86E−03 | 8.56E+06 | 1.36E+07 | 1.56E+00 |
| 1.5S09Lnu2.0 | 5.13E−01 | 4.71E−03 | 8.43E+06 | 1.28E+07 | 1.65E+00 |
| 1.3S18Lnu2.0 | 4.47E−01 | 7.58E−03 | 8.79E+06 | 1.50E+07 | 1.50E+00 |
| 1.4S18Lnu2.0 | 4.50E−01 | 6.21E−03 | 8.64E+06 | 1.42E+07 | 1.58E+00 |
| 1.5S18Lnu2.0 | 4.71E−01 | 4.92E−03 | 8.48E+06 | 1.33E+07 | 1.66E+00 |
| 1.3S09Lnu2.3 | 5.20E−01 | 8.71E−03 | 8.84E+06 | 1.51E+07 | 1.48E+00 |
| 1.4S09Lnu2.3 | 4.94E−01 | 7.58E−03 | 8.75E+06 | 1.48E+07 | 1.56E+00 |
| 1.5S09Lnu2.3 | 5.13E−01 | 5.99E−03 | 8.55E+06 | 1.38E+07 | 1.64E+00 |
| 1.3S18Lnu2.3 | 4.47E−01 | 1.02E−02 | 9.09E+06 | 1.68E+07 | 1.49E+00 |
| 1.4S18Lnu2.3 | 4.50E−01 | 8.15E−03 | 8.86E+06 | 1.56E+07 | 1.58E+00 |
| 1.5S18Lnu2.3 | 4.71E−01 | 6.30E−03 | 8.61E+06 | 1.44E+07 | 1.66E+00 |
| 1.3S09Lnu2.5 | 5.20E−01 | 1.05E−02 | 9.04E+06 | 1.62E+07 | 1.48E+00 |
| 1.4S09Lnu2.5 | 4.94E−01 | 9.11E−03 | 8.91E+06 | 1.59E+07 | 1.56E+00 |
| 1.5S09Lnu2.5 | 5.13E−01 | 7.04E−03 | 8.66E+06 | 1.46E+07 | 1.64E+00 |
| 1.3S18Lnu2.5 | 4.47E−01 | 1.28E−02 | 9.34E+06 | 1.84E+07 | 1.49E+00 |
| 1.4S18Lnu2.5 | 4.50E−01 | 9.88E−03 | 9.05E+06 | 1.68E+07 | 1.57E+00 |
| 1.5S18Lnu2.5 | 4.71E−01 | 7.45E−03 | 8.75E+06 | 1.52E+07 | 1.66E+00 |
Notes.
aThe model names is consisted of core mass, type of Si+S mass, and luminosity in order. bMass inside the gain region. cRadius at gain region. dRadius at shock front. eThe enclosed mass inside the inner boundary.Download table as: ASCIITypeset image
Using all of these 18 models as initial conditions, we run simulations assuming spherical symmetry. We also conduct 2D computations for eight models, which generate robust explosions in 1D. In these simulations, we employ in the region outside the stalled shock wave the profiles of the accreting envelopes at tpb = 300 ms, which were obtained in the calculations of the accretion histories in Step 2. As a result of this, the mass accretion rate varies in time. We keep the neutrino luminosity constant in time until shock revival occurs. Once it occurs, we allow the neutrino luminosity to evolve in time according to Equation (11). The results are summarized in Table 4, which will be used frequently later for discussion. In this table, the mass accretion rates at the shock revival,  , are sampled at r = 400 km and are essentially the same as those on the shock front. The diagnostic explosion energy, which is denoted by Eexp, is defined as

in which the total energy density, etot, is given by the sum of kinetic (ekin), internal (eint), and gravitational (egrav) energy densities as

the summation in Equation (12) extends over the grid points with positive radial velocities, vr, and total energy densities; ΔV stands for the cell volumes for these grid points. Note that the rest mass energy is not included in the internal energy in the above definition. The diagnostic energy is also used in judging shock revival: we consider that the stalled shock wave revives if the diagnostic energy reaches 1048 erg.
Table 4. Summary of the Explosion Results in 1D and 2D
| Model | Eexp (foe) | MNi (M⊙) | treva (s) | MPNS (M⊙) |
 b (M⊙ s−1)
 |
|---|---|---|---|---|---|
| 1D | |||||
| 1.3S09Lnu2.0 | 8.40E−01 | 8.80E−02 | 7.40E−01 | 1.68E+00 | 3.09E−01 |
| 1.4S09Lnu2.0 | 6.70E−01 | 7.00E−02 | 8.30E−01 | 1.78E+00 | 2.54E−01 |
| 1.5S09Lnu2.0 | 4.40E−01 | 4.95E−02 | 1.00E+00 | 1.91E+00 | 2.16E−01 |
| 1.3S18Lnu2.0 | 7.50E−01 | 7.50E−02 | 6.00E−01 | 1.62E+00 | 2.77E−01 |
| 1.4S18Lnu2.0 | 5.30E−01 | 5.70E−02 | 7.00E−01 | 1.73E+00 | 2.22E−01 |
| 1.5S18Lnu2.0 | 4.20E−01 | 4.67E−02 | 7.90E−01 | 1.85E+00 | 1.92E−01 |
| 1.3S09Lnu2.3 | 1.22E+00 | 1.08E−01 | 5.70E−01 | 1.60E+00 | 3.63E−01 |
| 1.4S09Lnu2.3 | 8.20E−01 | 9.05E−02 | 6.40E−01 | 1.72E+00 | 3.18E−01 |
| 1.5S09Lnu2.3 | 6.10E−01 | 7.20E−02 | 7.80E−01 | 1.85E+00 | 2.48E−01 |
| 1.3S18Lnu2.3 | 1.37E+00 | 1.09E−01 | 4.30E−01 | 1.54E+00 | 4.06E−01 |
| 1.4S18Lnu2.3 | 1.13E+00 | 9.10E−02 | 4.70E−01 | 1.64E+00 | 3.60E−01 |
| 1.5S18Lnu2.3 | 8.14E−01 | 7.20E−02 | 7.00E−01 | 1.78E+00 | 3.01E−01 |
| 1.3S09Lnu2.5 | 1.64E+00 | 1.49E−01 | 4.40E−01 | 1.51E+00 | 4.64E−01 |
| 1.4S09Lnu2.5 | 1.43E+00 | 1.22E−01 | 4.80E−01 | 1.63E+00 | 4.27E−01 |
| 1.5S09Lnu2.5 | 7.30E−01 | 8.40E−02 | 6.70E−01 | 1.82E+00 | 3.10E−01 |
| 1.3S18Lnu2.5 | 1.40E+00 | 1.24E−01 | 3.70E−01 | 1.52E+00 | 4.32E−01 |
| 1.4S18Lnu2.5 | 1.45E+00 | 9.60E−02 | 4.30E−01 | 1.61E+00 | 3.83E−01 |
| 1.5S18Lnu2.5 | 1.07E+00 | 9.40E−02 | 4.70E−01 | 1.73E+00 | 3.66E−01 |
| 2D | |||||
| 1.3S09Lnu2.0 | 8.96E−01 | 3.95E−02 | 6.16E−01 | 1.63E+00 | 3.30E−01 |
| 1.4S09Lnu2.0 | 7.60E−01 | 6.08E−02 | 6.40E−01 | 1.72E+00 | 3.10E−01 |
| 1.3S18Lnu2.0 | 9.70E−01 | 3.45E−02 | 5.34E−01 | 1.60E+00 | 3.51E−01 |
| 1.4S18Lnu2.0 | 7.46E−01 | 4.03E−02 | 5.25E−01 | 1.72E+00 | 3.10E−01 |
| 1.3S09Lnu2.3 | 1.55E+00 | 1.01E−01 | 4.07E−01 | 1.53E+00 | 4.72E−01 |
| 1.4S09Lnu2.3 | 1.46E+00 | 1.08E−01 | 3.95E−01 | 1.61E+00 | 4.69E−01 |
| 1.3S18Lnu2.3 | 1.48E+00 | 1.04E−02 | 3.92E−01 | 1.50E+00 | 4.36E−01 |
| 1.4S18Lnu2.3 | 1.26E+00 | 6.27E−02 | 3.96E−01 | 1.63E+00 | 4.03E−01 |
Notes.
aThe shock revival time measured from post-bounce. bThe mass accretion rate at trev.Download table as: ASCIITypeset image
3.2.1. Critical Luminosity
The luminosities, mass accretion rates, as well as PNS mass at shock revival are presented in Figure 7 for the 18 spherical models. The upper panels display the results for the models with MSiS = 0.09 M⊙, whereas the lower panels are the counterparts for the models with MSiS = 0.18 M⊙. The left panels exhibit the so-called critical curves, in which the neutrino luminosity at shock revival is regarded as a function of the mass accretion rate at the same time,  . It is evident that critical luminosity is a monotonically increasing function of the mass accretion rate, which is consistent with other studies (Murphy & Burrows 2008; Nordhaus et al. 2010; Hanke et al. 2012; Couch 2013; Iwakami et al. 2014). It is interesting to point out that the curve is upward convex for the models with MSiS = 0.09 M⊙ while it is downward convex for the models with MSiS = 0.18 M⊙. This is related with the locations of layer boundaries, at which the mass accretion rate decreases rapidly, and will be discussed in more detail in Appendix

Figure 7. Critical luminosity curves and PNS mass evolutions. The left panel shows the  relation which is called the critical luminosity curves.
  is measured at 400 km. The right panels depict the
  map which imples the time evolution of MPNS. The solid line trajectories are from the Lν = 2.0 models and the points indicate the final masses of MPNS. The colors used in every model prescribe different core mass models, Mc = 1.30 (red), Mc = 1.40 (green), and Mc = 1.50 (blue). The symbols also describe the different Si+S layer mass, MSiS = 0.09 (open square), and MSiS = 0.18 (filled square). The lighter MSiS models are shown in the top panels whereas the higher in the bottom panels.
Download figure:
Standard image High-resolution imageIn the right panels of Figure 7, we give the trajectories of the mass accretion rate and the PNS mass for different masses of the Fe core and Si+S layer. As time passes, the mass accretion rate gets lowered while the PNS mass becomes larger. Note that the mass accretion rates measured at r = 400 km are independent of the neutrino luminosities. The points, at which shock revival occurs for the 18 models, are marked with squares in the figure. As the luminosity decreases, shock revival is delayed and, as a result, the mass accretion rate becomes lower. Note that the positions of the squares are slightly off the trajectories. In fact, we employ the PNS masses at the end of simulations instead of those at shock revival in plotting these squares. Hence, their vertical deviations from the trajectories indicate the masses gained or lost by PNS owing to the inflow or outflow of matter through the inner boundary after shock revival. In the 1D case, the mass is always lost, since the outflow is dominant via neutrino winds. This is not always the case in 2D as shown later, in which the neutrino-driven wind occurs more strongly.
In Figure 8 we plot the time evolutions of the mass accretion rates and the shock revival points for the three core masses: Mc = 1.30 M⊙ (left panel), 1.40 M⊙ (middle panel), and 1.50 M⊙ (right panel). It is evident from these plots that shock revival is delayed for more massive iron cores. This is simply because of the stronger gravitational attraction. The higher mass accretion rates for the model with MSiS = 0.09 M⊙ leads to the fact that it obtains shock revival later than the model with MSiS = 0.18 M⊙ irrespective of the core mass (see Appendix

Figure 8. Mass accretion histories for six toy pre-supernova stages. The colors show the different core types, Mc = 1.30 (red), 1.40 (green), and 1.50 M⊙ (blue), whereas the line types correspond to MSiS = 0.09 (solid) and 0.18 M⊙ (dotted), respectively. The symbols illustrate the different neutrino luminosities at the shock revival time, Lν,52 = 2.5 (filled circle), 2.3 (open circle), and 2.0 (cross).
Download figure:
Standard image High-resolution image3.2.2. Explosion Energy and Nickel Mass
We turn attention to the explosion energies and Ni yields in the 1D models, which are summarized in the second and third columns in Table 4. For fixed masses of Fe core and the Si+S layer, both the explosion energy and the mass of synthesized Ni monotonically decrease as the neutrino luminosity is reduced. This is consistent with the findings in our previous paper (Yamamoto et al. 2013). This is a consequence of the delay of shock revival for lower neutrino luminosities (see the fourth column in the table), which in turn results in smaller mass accretion rates (the last column of the table).
In Figure 9 the time evolutions of these quantities are presented. We show in addition the energies gained by neutrino heating, Eν, and produced by recombinations and nuclear burnings, Enuc, as well as the yields of some major elements as functions of time. The former two are evaluated, respectively, as


where  is the time interval of the nth time step in the simulations and
  and
and  are the local energy production rates via the nuclear reactions and neutrino-heating rate, respectively; the summation runs over the same grid points in Equation (12).

Figure 9. Time evolution of energies and ejecta masses for Mc = 1.40 M⊙ with MSiS = 0.18 M⊙. The top panels: the time evolutions of a diagnostic explosion energy (red line), nuclear source (blue line), and neutrino source (green line). The bottom panels: the time evolutions of ejecta masses for α (red line), 5656 (blue line), 28Si (green line), 54Fe (purple), and neutron (dark green). The neutrino luminosities are chosen as Lν = 2.5 (left panel), 2.3 (middle panel), and 2.0 (right panel) × 1052 erg s−1, respectively.
Download figure:
Standard image High-resolution imageWe first compare the results for different neutrino luminosities, which are shown in Figure 9. In the top panel the temporal changes of the energies given above are displayed for the models with the Fe core mass of Mc = 1.40 M⊙ and the Si+S layer mass of MSiS = 0.18 M⊙. In the bottom panels, on the other hand, the mass yields of 56Ni, 54Fe, 28Si, 4He, and free neutron are presented. It is found from the top panels that lower luminosities indeed delay shock revival and result in smaller explosion energies. The same is true of the nickel mass yield, as is also evident from the bottom panels. The diagnostic explosion energy, Eexp, increases mainly by the nuclear energy releases from the recombinations to 4He and heavier elements at first and via the nuclear burnings later. The later slow decline in the diagnostic explosion energy is caused by the engulfing of gravitationally bound envelopes and by some fall backs. Rather small contributions from neutrino heating are deceptive. It should be noted in fact that these energies are calculated only after shock revival. Most of the energy given by neutrino heating is consumed to lift matter up from the gravitational well and make it ready for expansion, which is not included in the evaluation of Eexp, however.
The productions of 4He followed by 54Fe and then 56Ni are due to the recombinations, while 28Si is mainly synthesized by oxygen burnings. The difference in the final yield of 54Fe contributes considerably to the difference in Enuc. It is also seen that not all 4He is consumed to assemble heavier elements and the so-called α-rich freeze out takes place. This sequence of events is essentially the same as those we found in our previous work (Yamamoto et al. 2013). It is mentioned that the wind contribution to Eexp is sometimes non-negligible and is the main reason why Enuc is asymptotically larger than Eexp in some cases and smaller in others. We will come back to this issue in Sections 3.2.4 and 3.3.
It is interesting to point out that the times of shock revival, trev, are not very far apart between the models with Lν = 2.5 × 1052 erg and 2.3 × 1052 erg, however, the explosion energies are substantially different. This corresponds to what we saw in the critical curve for the models with MSiS = 0.18 M⊙ (the lower left panel of Figure 7): the critical luminosities are different for not-so-different mass accretion rates.
The increase in the core mass affects the evolutions of the explosion energy and ejecta mass in a way similar to the decrease in the neutrino luminosity. For instance, for the fixed parameter sets (MSi+S/ M⊙, Lν,52) = (0.18, 2.3), robust explosions with Eexp ≳ 1.0 × 1051 erg are obtained for smaller cores (Mc = 1.30 and 1.40 M⊙). The yield of 56Ni is also a decreasing function of the core mass. These are common trends shared by other models (except for the model with Mc = 1.30 M⊙, MSiS = 0.18 M, and Lν = 2.5 × 1052 erg s−1, in which shock revival occurs very early on (texp = 0.37 s), but the explosion energy is a little bit smaller than the model with the heavier core of Mc = 1.40 M⊙). This may seem to be simply explained by different gravitational attractions by the central PNS but there is something more here, which we will discuss in Section 3.2.3.
The MSiS dependence is rather complicated. In the case of Lν,52 = 2.3, the higher MSiS induces an earlier and more energetic explosion since the growth rate of radial perturbation is larger than that of the mass accretion rate. The behavior in Enuc reflects the yield of 54Fe as in the previous cases. The synthesized 56Ni are nearly the same between the models with the different MSiS. The PNS is more massive for MSiS = 0.09 M⊙, reflecting the delay of shock revival in that case. These trends are common to other core mass models (see Table 4). For the lower luminosity case (Lν = 2.0 ×1052 erg s−1), on the other hand, shock revival is still delayed for the lighter Si+S layer but the accretion rate at the shock revival is larger for MSiS = 0.09 M⊙ and, as a consequence, the explosion energy and the nickel yield are both greater for these models than those with MSiS = 0.18 M⊙. Note that the PNS is still more massive for the delayed shock revival. This happens again because high  leads to the canonical explosion energy (see more detailed discussions in the next section and Section 3.3). In the higher luminosity models (Lν = 2.5 × 1052 erg s−1), the shock revival time behaves similarly to the first case (Lν = 2.3 × 1052 erg s−1): it is delayed for MSiS = 0.09 M⊙. The accretion rates and hence the explosion energies and nickel masses are non-monotonic with the Si+S layer mass. In fact, they are larger for MSiS = 0.09 M⊙ than for MSiS = 0.18 M⊙ in the models with Mc = 1.30 and 1.40 M⊙, whereas the opposite is true for Mc = 1.50 M⊙, which has already explained in Section 3.2.1.
Figure 10 summarizes the explosion energies and nickel masses thus obtained in the Eexp–MNi plane with some observational data taken from Pejcha & Prieto (2015a). The upper left panel shows all 18 models, illuminating the clear correlation between them, which is well fitted by

This is consistent with our previous findings (Yamamoto et al. 2013). It is interesting, however, that the correlation still holds among different Mc and/or MSiS models. The other three panels display the correlation for different neutrino luminosities separately. It is apparent from these results that as the neutrino luminosity becomes lower, the location of data points in the plane shifts roughly from the upper right to the lower left part on the line that expresses the suggested correlation, which implies that the explosions get weaker and the nickel yield becomes smaller. Looking into the individual cases more closely, we find that the models with Lν = 2.0 × 1052 erg s−1 are more strongly correlated, whereas the models with higher luminosities have larger dispersions. This is mainly due to larger contributions from the neutrino wind in these models. It is also mentioned that the shock revival for Lν = 2.5 × 1052 erg s−1 occurs around the Si/O interface, where  changes rapidly.

Figure 10. Relation between explosion energy and nickel mass. Each panels correspond to the results of Lν,52 = 2.0, 2.3, 2.5 (top left panel), Lν,52 = 2.5 (top right panel), Lν,52 = 2.3 (bottom left panel), and Lν,52 = 2.0 (bottom right panel), respectively. The colors used in every model prescribe different core mass models, Mc = 1.30 (red), Mc = 1.40 (green), and Mc = 1.50 M⊙ (blue). The least-square line for 18 explosion models is indicated in all panels and observation data are reproduced from Pejcha & Prieto (2015a). The symbols also describe the different Si+S layer mass, MSiS = 0.09 (open square), and MSiS = 0.18 M⊙ (filled square). The dashed lines are indicators of typical observation values.
Download figure:
Standard image High-resolution imageIt has been commonly supposed that the typical explosion of CCSNe produces Eexp ≳ 1051 erg and MNi ≲ 0.1 M⊙ (Hamuy 2003; Nomoto et al. 2006; Kochanek et al. 2008; Utrobin & Chugai 2008; Smartt et al. 2009). This corresponds to the lower right quadrant in each panel. It is evident that not many models, actually only three of them, fall in this region. Recent observations (for example, the papers listed in Table 1 in Pejcha & Prieto 2015b) and their analysis (Pejcha & Prieto 2015a) suggest that the explosion energy and the nickel mass are correlated and occupy the region indicated in the figure. Note that the fitted line expressed by Equation (16) traverses only the upper part of this region. This means that it is difficult in 1D models to obtain the right combination of explosion energy and 56Ni mass. As demonstrated later, the disagreement is resolved in the 2D models, which may be yet another support for the claim that multi-dimensionality is crucial for explosion.
3.2.3. Dependences of Explosion Energy on Model Parameters
Now we look into the dependences of the explosion energy on the parameters that characterize the progenitor structures. Although no clear relation is observed between the explosion energy and Mc or MSiS, a tight correlation is found if we choose the mass accretion rate at shock revival is adopted, which is demonstrated in the left panels of Figure 11. Each panel plots for one of the three neutrino luminosities the results for six progenitor models. The solid line is the least-square fit to all 18 data points. It is rather surprising that all the models fall so closely to the line. The correlation is found to be fitted as

Larger  are favorable for strong explosions as long as shock revival occurs. In our 1D models,
  is required to produce an explosion with Eexp ≳ 1051 erg.

Figure 11. Physical properties of explosion energy in 1D. The left panel shows mass accretion rate dependence on Eexp while the right panel shows the proto-neutron star mass dependence on Eexp. The top, top middle, bottom middle, and bottom panels correspond to all three luminosities, Lν,52 = 2.5, Lν,52 = 2.3, and Lν,52 = 2.0 explosion models. The least-squared line of all 1D explosions for corresponding map is drawn in each panels.
Download figure:
Standard image High-resolution imageOn the right panels of Figure 11, we examine possible correlations between the explosion energy and the final PNS mass. The solid line is again the least-square fit to all data. Although there may be a rough trend that the explosion energy gets smaller as the PNS mass becomes larger, the scatter around the fitting line is not so small. In fact, the following three combinations, 
 ,
,  for MSiS = 0.09 M⊙, give almost the same Eexp although the PNS masses are substantially different among them. They have almost same mass accretion rates at shock revival, on the other hand. It should be noted that although larger PNS masses generate stronger gravitational attractions and are not favorable for shock revival in this respect, they are often a consequence of greater mass accretion rates, which are favorable for robust explosions. These competing effects result in the non-monotonic behavior of the explosion energy versus PNS mass. It is hence better to consider the influence of the PNS mass on Eexp only through
  .
.
3.2.4. Axisymmetric 2D Explosions
We turn our attention to 2D models, in which we assume axisymmetry. It has been demonstrated by different authors (Dolence et al. 2013; Hanke et al. 2013; Murphy et al. 2013; Couch & O'Connor 2014; Fernández et al. 2014; Takiwaki et al. 2014; Fernández 2015; Müller 2015) that the nature of turbulence is qualitatively different between 2D and 3D and that the shock dynamics is affected accordingly. It has, however, also been shown that the difference between 2D and 3D is much smaller than that between 1D and 2D (Nordhaus et al. 2010; Hanke et al. 2012; Couch 2013). We hence expect that our 2D models will still be able to illuminate how the multi-dimensionality of dynamics modifies our findings so far obtained in the 1D models.
For 2D simulations, we employ only the models with Mc = 1.30 and 1.40 M⊙, since the heaviest core (Mc = 1.50 M⊙) models are likely to produce mostly under-energetic explosions except for the highest neutrino luminosity (Lν = 2.5 × 1052 erg s−1) case, which is also not considered in the following.
The critical neutrino luminosities are plotted in the left panels of Figure 12 together with the 1D results presented already in Figure 7. In most of the 2D models, shock revival sets in earlier at higher mass accretion rates than in the corresponding 1D cases. This is due to the hydrodynamical instabilities such as convection and SASI, which expedite shock revival by expanding the gain region and making the dwell time in the region longer, and is consistent with the previous findings by others (Murphy & Burrows 2008; Scheck et al. 2008). In the case of Lν = 2.0 × 1052 erg s−1, for example, the shock revivals occur immediately after the Si/O interface hits the shock front in 2D, since the multi-dimensional effects just mentioned push the post-shock flows almost to the critical points prior to the encounter with the layer boundary and these models do not need to wait further when the interface actually hits the stalled shock wave.

Figure 12. Same as Figure 7 but including four pre-supernova models in 2D. The 2D results of Mc = 1.30 and 1.40 M⊙ are described as orange and dark yellow, respectively. It should be noted that several symbols of the 2D explosion are overlapped on those of 1D and even on different 2D models. For instance, in the top left panel symbol overlaps appear at  (orange and dark yellow) and
  (dark yellow and red), and also in both of the bottom left panels at
  (dark yellow and green).
Download figure:
Standard image High-resolution imageThe right panels present the mass accretion rates at shock revival together with the final values of the PNS mass just as the right panels of Figure 7. The solid lines are the trajectories for the designated models. The reason why the squares are not sitting on these lines is because the final values instead of the values at shock revival are employed for plotting these data (see also Figure 7). The vertical distance between the trajectory and data point represents the mass gained or lost by the PNS after shock revival. Since the fallback of matter is generally stronger in 2D, MPNS tends to be heavier in 2D than in 1D.
The time evolutions of the explosion energy as well as the masses of some major elements in the ejecta are shown in Figure 13 for the 2D model with Lν = 2.3 × 1052 erg s−1, Mc = 1.40 M⊙, and MSiS = 0.09 M⊙. For comparison, the corresponding 1D model is exhibited in the right panels. Due to the non-radial fluid instabilities, shock revival occurs much earlier in 2D. The higher mass accretion rate then results in the larger Eexp. It is noteworthy in this context that the curve of Eexp is always running below that of Enuc in the top right panel for 1D, whereas the opposite is true in the 2D model. The contribution from the neutrino heating rises more slowly and continues longer in 2D. The mass of 56Ni in the ejecta is gradually decreasing at late times in 2D. These facts are all consequences of stronger neutrino winds, i.e., outward matter flows from the inner boundary in our simulations. The neutrino wind mainly consists of hot nucleons earlier and α particles later, which will contribute to the explosion energy through recombinations. The addition of these fresh nucleons is the main reason for the more long-lasting neutrino heating in 2D. The later α particle ejection underestimates the neutrino heating and nuclear the recombination energy which should be provided outside the active calculation region (see also Section 3.3).

Figure 13. Same as Figure 9 but comparing the  model in 1D with in 2D. The top panels show the time evolution of the spherical model whereas the bottom panels show those of axisymmetry, respectively. The neutrino luminosities are chosen as Lν = 2.3 × 1052 erg s−1.
Download figure:
Standard image High-resolution imageThe neutrino wind adds slightly neutron-rich matter to the ejecta, which later recombines to produce 54Fe instead of 56Ni. This is one of the reasons why the mass of synthesized 56Ni is generally smaller in 2D than in 1D. It should be noted, however, that the neutrino wind is one of the most uncertain components in our simulations. In fact, it is actually dictated by the inner boundary condition imposed in our models (see also Yamamoto et al. 2013), although it should have been obtained from the self-consistent evolution of PNS. In fact, previous realistic simulations by other groups, e.g., Scheck et al. (2006), Marek & Janka (2009), and Bruenn et al. (2014), demonstrated that the neutrino-driven wind and its heating by neutrinos may last for more than ∼500 ms, and hence is one of the main contributors to the explosion energy.
We demonstrate in the left panels of Figure 14 that the explosion energy is tightly correlated with the mass accretion rate at shock revival. It is intriguing that the 2D models fall on the same line (see Equation (17)) with the 1D models. On the other hand, the correlation between Eexp and MPNS seems to become stronger in the 2D cases, as shown in the right panels of Figure 14. It should be mentioned here that the PNS mass is more difficult to estimate in 2D, since the fallback is more violent and highly anisotropic and it takes place simultaneously with the neutrino wind. It will hence be necessary to investigate a larger number of models to justify the above statement.

Figure 14. Same as Figure 11 but with eight axisymmetry explosions. The least-squared lines are also the same as in Figure 11. Note that several symbols are overlapped, e.g., different dimensions of  in Lν,52 = 2.3 (filled dark yellow and green) and the 2D explosion of Mc = 1.40 M⊙ with different MSiS in Lν,52 = 2.0 (open and filled dark yellow).
Download figure:
Standard image High-resolution imageFinally, the explosion energies and masses of synthesized 56Ni are plotted in Figure 15 for all models, including the 2D computations. One can easily recognize that the 2D results are qualitatively different from those for 1D unlike the correlation between Eexp and  demonstrated in Figure 14. In fact, the stronger fallback and neutrino wind in 2D both tend to reduce the mass of 56Ni in the ejecta compared with the 1D counterparts and the data points for 2D seem to be fitted by a steeper line (red solid line), although there is a scatter for the low-energy explosions. We showed earlier that the 1D models tend to produce too much nickel if they explode in the first place (see also Figure 10) and that the correlation between the explosion energy and the nickel mass is qualitatively different from that suggested by the observations, which we claimed is yet another reason that 1D explosions are disfavored in the neutrino-heating mechanism. In the 2D case, the reduced nickel production puts both the explosion energy and the Ni mass in the right region (see references in Bruenn et al. 2014; Pejcha & Prieto 2015a). This is consistent with the findings in our previous paper (Yamamoto et al. 2013).

Figure 15. Same as Figure 10 but  are depicted with the additional eight explosion calculations in 2D. The least-squared lines for 2D (red solid) drawn in each panels are also added from Figure 10.
Download figure:
Standard image High-resolution imageFrom the figure it may be said that the mass of the Si+S layer affects the Ni synthesis more than the Fe core mass. It should be mentioned, however, that the precise estimation of the nickel mass in the ejecta is made difficult not only by the uncertainty in the neutrino wind but also by later interactions of the shock wave with the helium and/or hydrogen layers, which may cause further fallback. This issue will be discussed more in the last section.
We mention the accuracy of our numerical simulations. To assess it, we conducted four more 2D computations with a finer radial or angular mesh for the parameter sets of (Mc/ M⊙, MSiS/ M⊙, Lν,52) = (1.30, 0.18, 2.3) and (1.40, 0.18, 2.0). We find in computations with a larger number of radial grid points (150 up from 600) that both the explosion energy and the Ni mass are changed by less than 0.5% at most. In the case of the finer angular mesh with 124 grid points in the θ direction, the explosion energy is changed by ∼3%, whereas the Ni mass is affected more with a difference of ∼10%, which is mainly caused by a greater fallback. These numerical errors, though not completely negligible, are not large enough to qualitatively change the conclusions, either.
3.3. The Correlation of Eexp and 

We have so far observed that the explosion energy, Eexp, is strongly correlated with the mass accretion rate at shock revival,  , irrespective of the dimension of dynamics. In this section, we look into the origin of this correlation more in detail. For that purpose, we introduce a new quantity, the total mass of the matter,
  , with the peak temperature higher than TP > 5 × 10⁹ K. Here the peak temperature is defined for each mass element as the highest temperature it attains during the expansion following shock revival. The threshold temperature, i.e., TP = 5 × 10⁹ K, is a temperature around which α particles are recombined to iron group elements.
  is hence the mass of the matter that experiences neutrino heating and recombinations, the two main contributors to the explosion energy. It is numerically evaluated as follows:

in which the superscript n labels mass elements on the numerical mesh and TP,9 = TP/109 K is a normalized temperature; the condition  implies that only expanding matter should be summed.
In Figure 16 we plot all the 1D (18 black crosses) and 2D (8 red crosses) results in the  (left) and
  (right) panels. It is evident that they are closely related with one another regardless of the dimension again. The least-square fits to them give the following power-law relations:

It is important that the explosion energy is almost linearly correlated with  , the fact suggesting that
  is more directly related with the explosion energy. This will be endorsed by more detailed analyses in the following.

Figure 16. Properties of typical mass ejecta  (see its definition from Equation (18)). The
  relation is plotted in the left panel while Eexp is shown as a function of
  in the right panel. Each color indicates 1D (black) and 2D (red), respectively, and the solid lines are the least-square lines for the 1D explosion models.
Download figure:
Standard image High-resolution imageWe define the explosion energy per nucleon, εexp, as well as the contribution to it from the nuclear reactions, εnuc, and from the neutrino heating, εν, as follows:

in which  is the number of the nucleons that consist of
  .
.
We also refer to the sum of the latter two as εsrc = εnuc + εν. We also pay attention below to the total energy per nucleon of the outer envelope, which is defined as

with Ebind being given by

Note that Ebind is negative owing to the gravitational binding, although it also contains the kinetic and internal energies, which are positive.
We plot these quantities for all 1D and 2D models in Figure 17, in which the horizontal axis is chosen to be  . First of all, it is clear that they are almost constant, indicating not only the total explosion energy but each contribution except for εbind is also nearly proportional to
  . If we look more closely, however, we can see some trends. In the left panel, in which the specific explosion energies are plotted, we can recognize that they increase slightly with
  , having values of 4.5 MeV ≲ εexp ≲ 6.0 MeV, although there are some scatterings. The reason for this increase is understood from the middle panel, in which εsrc and εbind are plotted for
  . It is found that they both decrease with
  . Since the binding energy of the envelope is almost unrelated to
  , the decrease of εbind is just a consequence of the increase of
  , the denominator in Equation (30), with
  . The decline in εsrc is much more moderate and, as a result, the total explosion energy per nucleon increases as shown in the left panel.

Figure 17. Explosion energy per nucleon and its contributions as a function of  . The left panel shows the explosion energy per nucleon, εexp. The net heating source per nucleon, εsrc (cross), and the enevelpe binding energy per nucleon, εbind (circle) are plotted in the middle panel. The right panel depicts two heating contributions per nucleon, εnuc(cross) and εν(circle). In all panels, black and red symbols correspond to the 1D and 2D explosions, respectively (see also the exact definition in Equations (20) and (22)).
Download figure:
Standard image High-resolution imageThe right panel shows the contents of εsrc, i.e., εnuc and εν. It is discernible that both of them decrease slightly, as does εsrc in the middle panel, although 2D results appear to have an opposite trend. This is due to the following reason: as  increases, the mass of the post-shock matter that has larger α fractions becomes greater, since the photo-dissociations to α occur at larger radii. As a result, the energy gain by later recombinations gets smaller; since the nucleons are mainly responsible for the neutrino heating, εν is also reduced. Note that the values of εnuc are ∼5–6 MeV, which are similar to those evaluated at r = 3000 km by Scheck et al. (2006), and are much larger than those of εν, which is at most ∼1–2 MeV. This is partly because that those values are evaluated after shock revival whereas the neutrino heating has started much earlier and is consumed mainly to lift up matter from the gravitational well. It should also be mentioned that the neutrino heating is also used to compensate for the loss by photo-dissociations. In this sense, the recombination energy is actually originated from the neutrino heating. It is interesting to point out that εbind is roughly comparable to εν.
The values of  as well as εnuc and εν are a bit smaller for 2D than for 1D, a fact which also seems to be the reason for the opposite trend we found in the middle and right panels between the 1D and 2D models. This happens because these quantities are evaluated only in the computational domain, that is, outside the artificial inner boundary. In fact, in 2D models some of the matter flowing into the computational domain through the inner boundary, to which we refer as the wind below, has already recombined to α particles, which then results in the reduction of εnuc and εν. This is all the more true for the 2D models with smaller
  , producing the opposite trends mentioned above.
The nice thing with the correlation between Eexp and  is that the latter is fixed earlier than the former. In fact,
  is determined by the time when the shock wave reaches ∼2000–3000 km in our models. It is true that the fallback occurs later after the shock reaches ∼5000 km, but this fallback matter does not have much energy as has been argued in Section 3.2.4. The correlation may hence be useful to estimate the explosion energy. There is one concern here, however. As mentioned above, the wind also contributes to the explosion energy, which is then expressed as

In this expression, the wind energy is denoted by εwind (see Marek & Janka 2009; Bruenn et al. 2014). Although this is not a dominant contributor in our models, the correlation may be degraded if it is, since we cannot expect that it is strongly correlated with  . Our models have admittedly no predictive power on the issue, since the wind is rather sensitive to the inner boundary condition we impose by hand. As a matter of fact, the wind contribution seems to be substantial in more realistic simulations (Burrows et al. 2007; Marek & Janka 2009; Fischer et al. 2010; Müller et al. 2012), and we are afraid that this may be the reason why the explosion energy is fixed rather early on in our models compared with other realistic simulations (Bruenn et al. 2014; Nakamura et al. 2015; Takiwaki et al. 2014; Müller 2015). Systematic studies will be conducted on the wind in our forthcoming paper.
3.4. Some Comments on our Lightest Core-mass Models
In the models considered in this paper, there is a clear tendency regardless of spatial dimensions that the explosion energy gets larger as the core mass becomes smaller. This may seem at odds with some recent realistic simulations (Bruenn et al. 2014; Nakamura et al. 2015; Takiwaki et al. 2014; Müller 2015) for light progenitors. In fact, they generically produced weak explosions of Eexp ≲ 0.1 × 1051 erg, e.g., for model s11.2 of 11.2 M⊙ by WHW2002. It is true that the time of shock revival is self-consistently determined in these realistic simulations and that the post-shock flow is not steady in reality but we believe that they are not the main cause for the discrepancy mentioned above but the progenitor models are.
As discussed in Section 2.2, the progenitor models can be classified into three groups labeled with "L," "M," and "H." In this paper, we focus on group M, since the majority of progenitor models belongs to this group. We then employ the entropy and Ye distributions, Equations (1) and (2), suitable for this group. Note that the lowest Fe core mass models are also based on these relations. On the other hand, some of the light progenitor models obtained by realistic evolution calculations are known to be affiliated with group L. Model s11.2 of 11.2 M⊙ by WHW2002 is indeed one of such models.
To see the difference between groups L and M, we show in Figure 18 the density and entropy distributions for their members. In the left panel, the horizontal axis is the enclosed mass, whereas the radius is adopted in the right panel. Note that only the entropy distributions, which are depicted with dashed lines, in the core as a function of density are different between the two models and the other parameters such as the masses of the Fe core and Si+S layer are identical. It is interesting that the density distributions in the Fe core are more or less the same between the two models. Instead, the difference manifests itself in the outer layers as is particularly evident in the left panel.

Figure 18. Density and entropy distribution of enclosed mass (left panel) and radius (right panel). The both panels depict the result of same parameter choice except for light (L: red) and medium (M: green) core function. The solid line denotes density whereas the dotted line entropy.
Download figure:
Standard image High-resolution imageThis may be understood as follows. In both models, the cores are in NSE and are mostly supported by degenerate electrons. As a result, the difference in entropy has a limited influence on the core structure. This is not the case, however, near the core surface as well as in the Si+S layer. Since the entropy is smaller at the core surface for group L than for group M but it is identical in the adjacent Si+S layer for both groups, the entropy jump at the interface is greater in group L. As the densities are nearly the same at the core surface between the two groups, this implies that the pressure is smaller for group L. Since the gravitational attraction is almost identical at the core surface as the mass and radius of the core are nearly the same, the pressure scale height is shorter for group L accordingly. This is reflected in the density scale height in the Si+S layer directly because the entropy is assumed to be identical for both groups there. This is the reason why the density is gradient steeper for group L than for group M as observed in the right panel of Figure 18.
If such an entropy difference in the core is indeed responsible for the discrepancy of the explosion energies mentioned above between the recent realistic simulations and our experimental computations, it may suggest that we would obtain canonical explosions if we could obtain via evolution calculations progenitor models with relatively high entropies in small cores. Detailed analyses of groups L and H will be reported in the forthcoming paper.
4. SUMMARY AND DISCUSSION
We have conducted experimental 1D and 2D simulations to study shock revival and the subsequent evolutions in the post-bounce of CCSNe. We have paid particular attention to the influences of progenitor structures, which are known to be diverse. Instead of employing the pre-supernova models provided by realistic stellar evolution calculations, we have constructed toy models, in which not only the Fe core mass but the proportion of outer layers can be also changed rather arbitrarily. In this paper, we have focused on the masses of the Fe core and the adjacent Si+S layer. We have run both 1D spherically symmetric and 2D axisymmetric simulations of the shock revival and the evolutions that follow, excising the central portion of the core and replacing it with the inner boundary conditions. We have investigated the dependences of the explosion energy and synthesized nickel mass, both of which are key observables in CCSNe, on some model parameters.
We have adopted the four-step strategy: (1) we first constructed the progenitor models with different Fe and SI+S layer masses; (2) we then calculated the mass accretion histories for these models, removing the central part and thus its pressure support in 1D simulations; (3) using the mass accretion rates at t = 300 ms post-bounce, we obtained spherically symmetric, steady, shocked accretion flows for three neutrino luminosities; (4) we performed 1D and 2D simulations of shock revival and the ensuing evolutions for the configurations obtained in the previous step, employing the mass accretion histories sampled in the first step; the light bulb approximation was adopted with the appropriate time evolution of the neutrino luminosity being taken into account. In these 1D and 2D simulations, we have incorporated nuclear recombinations and burnings consistently with the multi-species (non-NSE) EOS.
The main results are as follows.
- 1.Based on the realistic progenitor models by Woosley et al. (2002), we have first demonstrated that the progenitor's core structures can be categorized into three groups dubbed as L, M, and H if one parametrizes the entropy and electron fraction as functions of density rather than of radius or enclosed mass. Since the majority of the massive star's cores seem to be affiliated with group M, we focus on this group in this paper. Groups L and H are meant for some of the lighter and heavier cores and will be investigated separately in the forthcoming paper. We have taken into account seven outer layers of different chemical compositions and assumed uniform distributions for the entropy and abundance in each layer, setting appropriate values to them. We have constructed six progenitor models this way with different combinations of three Fe core masses, Mc = 1.30, 1.40, and 1.50 M⊙ and two Si+S layer masses, MSiS = 0.09 and 0.18 M⊙. We have found that for heavier Fe cores, the compactness, that is, the ratio of enclosed mass to radius, is larger in the Si layer but becomes smaller in the O+Ne+Mg layer. It has been also shown that more massive Si+S layers induce larger differences in the outer envelopes.
- 2.The accretion histories are found to be commonly characterized by the initial rise of to a peak, which corresponds to the contraction of the entire Fe core into the radius of ∼100 km, and the ensuing rapid decline that is followed by the much slower decrease. There are a couple of steps, where the mass accretion rate drops suddenly. They are caused by the interfaces of different layers. It is interesting that the mass accretion histories for models with different Fe core masses are similar to each other if they are shifted in time so that the peaks of should coincide with each other. This is particularly so when the Si+S+O layer is accreting onto the shock wave, probably the most critical period for shock revival. The locations of the steps just mentioned are different, on the other hand, occurring earlier for smaller cores. It is also found that the increase in the Si+S layer mass from 0.09 M⊙ to 0.18 M⊙ results in the reduction of by ∼10%.
- 3.Connecting the pairs of (, Lν) at shock revival for the models with different neutrino luminosities, we have obtained the critical curves for different progenitor models both in 1D and 2D. In accord with the previous results by various researchers, the critical luminosity is a monotonically increasing function of the mass accretion rate. We have also found different convexities between the models with MSiS = 0.09 M⊙ and MSiS = 0.18 M⊙: the critical curve is upward convex for MSiS = 0.09 M⊙ and downward convex for MSiS = 0.18 M⊙. We have demonstrated that they just trail different portions of the mass accretion histories. At the vertical dent of the critical curve, different critical luminosities are obtained for almost the same mass accretion rates, since the rapid drop of at the interface of different layers followed by the slow decline put these different luminosity models simultaneously in the states, where overstable radial modes trigger shock revival (see Appendix
C ). In the 2D models, shock revival occurs earlier or at larger in general. Again, the shape of the critical curve can be understood from the mass accretion rates around the shock revivals. - 4.In line with the our previous findings (Yamamoto et al. 2013), the diagnostic explosion energy rises via neutrino heating initially and then the nuclear recombinations followed by nuclear burnings take its place. It approaches the asymptotic value, gradually decreasing its value owing to gravitationally bound envelopes. The neutrino wind also contributes to the explosion energy both through its internal + kinetic energy and recombinations. As the neutrino luminosity decreases, shock revival is delayed, leading in general to smaller Eexp (see also the next item). Shock revival occurs earlier for heavier Si+S layers, since the mass accretion rate around shock revival is smaller for them. The dependence of Eexp on MSiS is rather complicated, however: for the low neutrino luminosity, the accretion rates are larger for MSiS = 0.09 M⊙ and, as a result, Eexp is also greater; for the high neutrino luminosity, on the other hand, the result depends on the core mass. It is true, in general, that larger core masses weaken explosions. The reason for this, however, is not the stronger gravitational attraction they exert on the ejecta but the smaller mass accretion rates they produce. The explosion energy is strongly correlated with the synthesized nickel mass irrespective of the progenitor structures. We have confirmed our previous findings (Yamamoto et al. 2013) that 1D explosions tend to produce either too much 56Ni or too weak explosions and a fine tuning is necessary to obtain both of them in the right regime simultaneously. This problem is solved in 2D, in which shock revival tends to occur earlier and, as a result, Eexp is greater; stronger fallbacks tend to reduce the nickel mass. The neutrino wind is also stronger and slightly neutron-rich. The latter fact further contributes to the reduction of nickel via the production of 54Fe rather than 56Ni.
- 5.We have observed that Eexp is tightly correlated with at shock revival (see Figure 14) irrespective of the dimension. We believe that this is a consequence of the fact that the mass of the matter that has the peak temperature higher than 5 × 10⁹ K is strongly correlated both with the explosion energy and the mass accretion rate at the shock revival. The linear relation between Eexp and may be useful to estimate the former, since the latter is settled earlier. If the lasting neutrino wind gives non-negligible contributions to the explosion energy, which was not observed in this paper, this correlation will be weakened. Our findings suggest that multi-dimensional explosions at earlier times will be the recipe to produce an appropriate explosion energy and a nickel mass simultaneously. They are sensitive to modest differences, ∼0.1 M⊙, in the masses of the Fe core and/or Si+S layer mass. This may be responsible for the scatter in their observed values for SNe II.


This paper is a sequel to our previous one (Yamamoto et al. 2013), in which only a single progenitor was investigated. The systematic comparison of multiple progenitors in this paper has confirmed the previous findings. On the other hand, the tight correlation between the explosion energy and the accretion rate at shock revival that we have found in this paper is interesting and has a potential to extract the information on the progenitor, i.e., one may be able to constrain the mass accretion history if neutrino luminosities and/or gravitational waves provide us with the shock revival time (Murphy et al. 2009). We have seen that our light Fe core models tend to produce robust explosions rather than the other way around. If this is indeed because we employed the distributions of entropy and electron fraction for group M instead of group L, which is suitable exclusively for light progenitors, it may suggest a new path for robust explosions, i.e., the neutrino-heating-driven explosions from smaller cores with rather high entropies, which might have evaded the current stellar evolution calculations. Binary interactions (Podsiadlowski et al. 1992; Langer 2012; Smith 2014), treatments of various convections (Martins & Palacios 2013; Jones et al. 2015), uncertainties in nuclear reactions rates (Buchmann 1996), and entrainments by complex multi-dimensional turbulent motions in convectively stable zones (Arnett & Meakin 2011; Canuto 2011; Arnett 2015) may merit further investigations in this respect.
This study is just the first step of a series of papers. It will be extended to (1) the investigations of the remaining groups L and H, (2) the comparison of our toy models with other realistic progenitor models available to us, (3) the systematic study of the dependences on other model parameter including the boundary conditions, and (4) the application to rotational stars.
Y.Y. is grateful to T. Yoshida, K. Nakamura, W. Iwakami, H. Nagakura, K. Takahashi, and R. Hirai for fruitful discussions. This work is partly supported by Grant-in-Aid for Scientific Research from the Ministry of Education, Culture, Sports, Science, and Technology of Japan (Nos. 19104006, 21540281, 24740165, 24244036, 22540297), and the HPCI Strategic Program of Japanese MEXT.
APPENDIX A: QSE COMPOSITIONS
The temperatures in the Si+S layer, which is adjacent to the Fe core, are not high enough to maintain NSE. They are still sufficiently high, however, to ensure chemical equilibrium individually among members belonging to the subsets of light nuclei and of heavy nuclei represented by 56Fe and 28Si, respectively. We then have the following relations:


where μ, N, and Z denote the chemical potential, neutron number, and proton number of the nucleus specified by the subscript: iFe, jSi, and kL give the members of the Fe, Si, and light element groups, respectively; p and n stand for the free proton and neutron, respectively.
Note that only the chemical potentials of  ,
,  , neutron, and proton are independent, which is analogous to NSE, in which the chemical potentials of nucleons are sufficient to give the entire chemical abundance. These four independent chemical potentials are determined by specifying the baryon density, total proton fraction, as well as the mass fraction of the silicon group, XSi−G, and the proton fraction in the silicon group. The last one is set to 0.5 as a good approximation. On the other hand, XSi−G is assumed to be expressed as a simple linear function of temperature as follows:
where T9 = T/109 K and  0 = 2.0 × 10⁻³. We also assume that the charge fraction in each group is 0.5. We adopt uniform distributions of entropy and electron fraction in this layer for simplicity.
APPENDIX B: MASS ACCRETION
In Section 3.1 we observed that the mass accretion rates for the models with different core masses but with the same mass of Si+S layer. Note, in particular, that the mass accretion rates are nearly the same during the period when the Si+S+O layer falls onto the radius of r = 100 km. This occurs at tpb ∼ 200–500 ms and ∼300–500 ms for the models with MSiS = 0.09 M⊙ and with MSiS = 0.18 M⊙, respectively (see the right panels).
This fact can be understood as follows. Since matter is falling nearly freely, i.e.,  , the Lagrangian change in density is given by the mass conservation equation as

in which α is expressed as

Here we have made the following evaluation,

where Rc and RSi are the outer edge radius of core and Si layer, respectively. Using vr = Dr/Dt, we integrate Equation (28) to obtain

where the initial radius and density are denoted by r0 and  , respectively. This equation describes the Lagrangian variation of the density for a particular fluid element, which is originally located at r0 with the density ρ0. In principle, the density profile at a give time is different from this Lagrangian variation with r. The latter approximates the former very well, though. In fact, the left panel of Figure 19 shows with colored thick lines the density profiles of the three models with MSiS = M⊙ at tpb = 100 and 500 ms. The progenitor structures are also displayed with thin lines. The colors specify the progenitors. The dotted line, on the other hand, indicates the power of −1.35, the approximate value of α in Equation (28). It is evident that the density distributions obey the power law for r ≲ 1000 km at tpb = 100 ms and the region is extended to ∼2000 km at tpb = 500 ms.

Figure 19. Density profiles for the MSiS = 0.09 M⊙ models. The left panel depicts snapshots at tpb = 100 ms (middle) and tpb = 500 ms (thick) while the right panel illustrates the mass shell trajectories which falls inside 100 km at tpb = 100 ms (middle) and tpb = 500 ms (thick). The thin line represent the initial profile in the both panels. The colors show Mc = 1.30 M⊙ (red), 1.40 M⊙ (green), and 1.50 M⊙ (blue), respectively and the dotted line indicates the power law of r−1.35. The arrows in the left panel illustrate initial layer positions for Mc = 1.50 M⊙.
Download figure:
Standard image High-resolution imageThe right panel of Figure 19 shows the Lagrangian changes in the densities and radii of the mass shells that reach r = 100 km at tpb = 100 and 500 ms. It is found from the two panels that the inner edge of the Si+S layer reaches r = 100 km at tpb = 100 ms, whereas the outer boundary of the Si+S+O layer, which starts to infall at around the same time, arrives at r = 100 km at tpb = 500 ms, by which time the rarefaction wave has reached the O+Ne+Mg layer. It is clear from the right panel that as the infall of the mass shells proceeds all the trajectories approach the power law as expected. As a matter of fact, they seem to converge in spite of the fact that the density and radii at the starting points are substantially different among different models. This is why we obtain the very similar mass accretion rates at the same post-bounce time. Note that this is also the reason why the Eulerian density distribution at a given time is well approximated by the Lagrangian change for a certain mass shell. Although the former is actually given by the collection of the end points for different Lagrangian evolutions, these Lagrangian evolutions are close to each other owing to the above convergence property.
Figure 20 shows the temporal evolutions of the densities and radii of the mass shells that reach r = 100 km at tpb = 500 ms. As can be seen, these quantities do not change very much initially, and it is for the last 100 ms during 700 ms of excursions that the free fall is fully established and the density and radius change rather rapidly according to Equation (31). Such a behavior may be the main reason for the convergence we have seen above. No doubt we need a larger number of models, including those from groups L and H, to judge how generic these findings are, since diverse accretion histories have been reported in the literature (Suwa et al. (2014)).

Figure 20. Time evolution of mass shells which reach 100 km at  ms for different core models with the same Si+S mass, MSiS = 0.09 M⊙. The thin and thick solid lines represent density and radius, respectively, and the colors correspond to core models, Mc = 1.30 M⊙ (red), 1.40 M⊙ (green), and 1.50 M⊙ (blue).
Download figure:
Standard image High-resolution imageIn reality, however, the accretion does not occur steadily and the free fall is a rough approximation to the actual matter velocities. In addition, α in Equation (28) is not constant either in space or in time. As a result, the accretion histories are not the same completely among these models but the agreement is still remarkable and will be useful in analyzing the influences of the mass accretion history on the shock revival and subsequent evolutions.
APPENDIX C: CONVEXITY OF CRITICAL CURVE
From Figure 7 in Section 3.2.1, the critical curves depict both upward and downward convex characters in the different MSiS cases. We saw in Section 3.2.1 (Figure 7) that the critical curves are upward and downward convex characters in other cases, depending on MSiS. In order to better understand the differences in the shape of the critical curves, we additionally conducted nine 1D simulations with Lν,52 = 1.8–2.6 for the progenitor model with Mc = 1.3 M⊙. Figure 21 shows the critical curves (left panel), the temporal evolutions of mass accretion rates (middle panel), and the critical luminosities as functions of the shock revival time (right panel). First of all, it is evident from the left panel that the convexity of critical curve changes as the shock revival time varies, i.e., each critical curve has portions that are upward or downward convex. The comparison between the left and middle panels makes it clear that a plateau in the critical curve corresponds to a cliff in the curve of mass accretion rate (see, e.g., the model with Lν,52 = 2.3 for MSiS = 0.09) and vice versa. The reason why the data points are sparse on the plateau and dense at cliff on the critical curve is simply because the duration of the plateau phase is shorter. As mentioned earlier, the mass accretion rate is lower for the model with MSiS = 0.18 M⊙ than for the model with MSiS = 0.09 M⊙ (see also the middle panel of Figure 21). As a result, for a given neutrino luminosity shock revival tends to occur earlier for the former. Note that the shock radius is also larger from the beginning for the same model.

Figure 21. High-resolution Lν outcomes for the two Mc = 1.30 M⊙ models. Each panel demonstrates critical luminosities (left panel), the history of  (middle), and
  as a function of trev (right). Open and filled symbols represent the MSiS = 0.09 (upper panels) and 0.18 M⊙ (lower panels) models, respectively.
Download figure:
Standard image High-resolution imageWe find from the left and middle panels of Figure 21 that some models have almost the same mass accretion rate but have substantially different critical luminosities: e.g., the models with Lν,52 = 2.0, 2.1, 2.2 for MSiS = 0.09 M⊙. In order to understand this situation, we plot in Figure 22 the time evolutions of the width Rsh–Rg (top panel) and the mass Mg (middle panel) of the gain region as well as the mass accretion rates (bottom panel) as functions of time for these three models. From the top and middle panels it is apparent that shock revival occurs as a consequence of the growth of overstabilizing oscillations, which is consistent with previous papers (Ohnishi et al. 2006 and Fernand-Rodriguez). The instability is triggered by the passage of the boundary between the Si+S+O layer and the O+Mg+Si layer at tpb ∼ 550 ms. The important point is that the mass accretion rate changes by the passage of the layer boundary much more quickly than the shock radius does by the oscillations. This means that these three models become supercritical and hence unstable instantaneously by the passage of the layer boundary. It is also apparent that the difference in the shock revival time simply reflects the difference in the oscillation periods and growth times, which are longer for smaller neutrino luminosiities, as shown by Yamasaki & Yamada (2007). Since the mass accretion rates change very slowly after the passage of the layer boundary, these models have almost identical accretion rates at shock revival.

Figure 22. Time evolutions of Rsh–Rg (top), Mg (middle), and  (bottom) in the part of plateau structure of the critical curve. Each color of lines and symbols corresponds to Lν,52 = 2.0 (red), 2.1 (green) and 2.2 (blue), respectively.
Download figure:
Standard image High-resolution image